The Best Fluffy Pancakes recipe you will fall in love with. Full of tips and tricks to help you make the best pancakes.
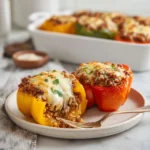
Stuffed Mini Peppers are one of the easiest and most delicious appetizers you can prepare. These bite-sized peppers are naturally sweet and crisp, making them the perfect vessel for a creamy and savory filling. When baked, the peppers become tender while the filling turns warm and flavorful, creating an irresistible snack or party dish.
This recipe is especially popular for gatherings because it combines vibrant colors, bold flavors, and simple preparation. Whether you’re hosting a party, preparing a holiday appetizer platter, or simply looking for a quick snack, stuffed mini peppers deliver great taste with minimal effort.
Mini bell peppers are naturally sweet and come in beautiful shades of red, orange, and yellow, making them visually appealing as well as delicious. Combined with creamy cheese, garlic, and herbs, they become a crowd-pleasing appetizer that disappears quickly from the table.
In this guide, you’ll learn how to make the perfect stuffed mini peppers along with helpful tips, variations, and serving ideas.

Why Stuffed Mini Peppers Are So Popular
Stuffed mini peppers are a favorite appetizer for several reasons.
1. Bite-Sized and Convenient
Their small size makes them perfect for parties and finger foods.
2. Colorful Presentation
The vibrant colors of mini peppers make the dish visually attractive.
3. Easy to Prepare
This recipe requires minimal prep and simple ingredients.
4. Versatile Filling Options
The filling can be customized with cheese, meat, herbs, or vegetables.
5. Healthy Snack Option
Peppers are rich in vitamins and antioxidants.
Ingredients
- 12 mini bell peppers
- 150 g cream cheese, softened
- ½ cup shredded cheddar cheese
- 1 clove garlic, minced
- 1 tablespoon olive oil
- 1 tablespoon chopped parsley
- ½ teaspoon paprika
- ¼ teaspoon black pepper
- ¼ teaspoon salt
Optional Additions
- Cooked bacon bits
- Chopped green onions
- Chili flakes
- Parmesan cheese

Instructions
1. Preheat the Oven
Preheat your oven to 190°C (375°F).
2. Prepare the Peppers
Wash the mini peppers and slice them in half lengthwise. Remove the seeds and membranes.
3. Make the Filling
In a bowl, combine cream cheese, shredded cheddar, minced garlic, parsley, paprika, salt, and black pepper. Mix until smooth.
4. Fill the Peppers
Using a spoon or piping bag, fill each pepper half with the cheese mixture.
5. Arrange on Baking Sheet
Place the stuffed peppers on a baking tray lined with parchment paper.
6. Drizzle Olive Oil
Lightly drizzle olive oil over the peppers for extra flavor.
7. Bake the Peppers
Bake for 15–18 minutes until the peppers are tender and the cheese filling is slightly golden.
8. Cool Slightly
Allow the peppers to cool for a few minutes before serving.
9. Garnish
Sprinkle extra parsley or chili flakes on top for garnish.
10. Serve and Enjoy
Serve warm as an appetizer or snack.
Tips for Perfect Stuffed Mini Peppers
Use Fresh Peppers
Choose firm and brightly colored mini peppers.
Soften the Cream Cheese
Softened cream cheese mixes more easily with other ingredients.
Don’t Overfill
Fill the peppers generously but avoid overfilling so the cheese doesn’t spill out while baking.
Use a Piping Bag
A piping bag makes filling the peppers easier and neater.
Add Texture
Sprinkle breadcrumbs or crushed crackers on top for a crispy topping.

Delicious Variations
Bacon Stuffed Peppers
Add cooked bacon bits to the cheese mixture.
Mexican Style Peppers
Add taco seasoning and pepper jack cheese.
Mediterranean Peppers
Mix in feta cheese, olives, and oregano.
Spicy Stuffed Peppers
Add chopped jalapeños or chili flakes.
Chicken Stuffed Peppers
Mix shredded cooked chicken into the filling.
Serving Suggestions
Stuffed mini peppers pair wonderfully with many dishes.
Appetizer Platters
Serve alongside olives, dips, and crackers.
Party Snacks
Perfect for game nights and gatherings.
Charcuterie Boards
Add them to cheese boards for extra color and flavor.
Light Lunch
Serve with a fresh salad.
Storage Tips
Refrigeration
Store leftovers in an airtight container in the refrigerator for up to 3 days.
Reheating
Reheat in the oven or air fryer until warmed through.
Freezing
Freezing is not recommended because the peppers may become watery.
Nutritional Benefits
Mini peppers are packed with nutrients.
Vitamin C
Peppers contain high levels of vitamin C.
Antioxidants
Brightly colored peppers contain powerful antioxidants.
Low-Carb Snack
This recipe can be suitable for low-carb diets.
Balanced Flavor
The combination of vegetables and cheese creates a satisfying snack.
Fun Food Fact
Mini bell peppers are actually harvested earlier than regular bell peppers, which gives them their smaller size and naturally sweeter flavor.
Why This Recipe Works
Stuffed mini peppers are loved because they are:
- Quick and easy
- Colorful and attractive
- Perfect for entertaining
- Customizable with many flavors
- A great balance of creamy and fresh textures
Once you make them, they will likely become a go-to appetizer for gatherings and parties.
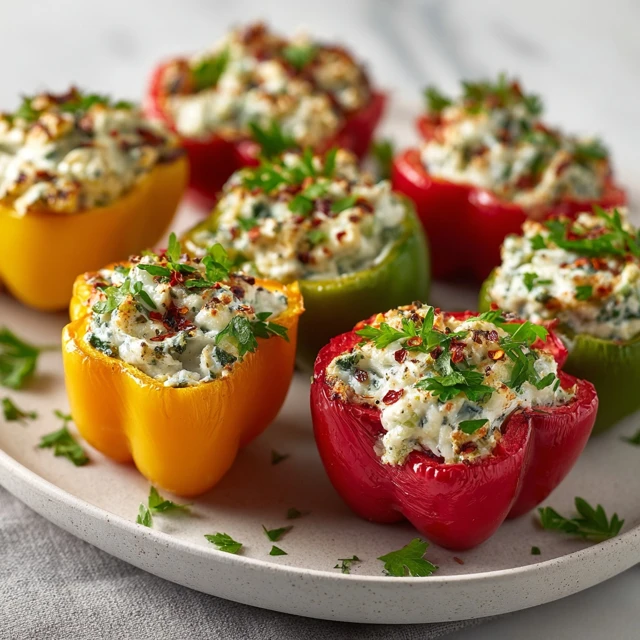
Stuffed Mini Peppers
Colorful mini bell peppers filled with a creamy cheese mixture and baked until tender.
Ingredients
Equipment
Method
- Preheat oven to 190°C.
- Slice mini peppers in half and remove seeds.
- Mix cream cheese, cheddar, garlic, parsley, and spices.
- Fill pepper halves with the cheese mixture.
- Place peppers on a baking sheet and drizzle with olive oil.
- Bake for 15–18 minutes until peppers are tender.
- Garnish with parsley and serve warm.
Notes
Use a piping bag to neatly fill the peppers.